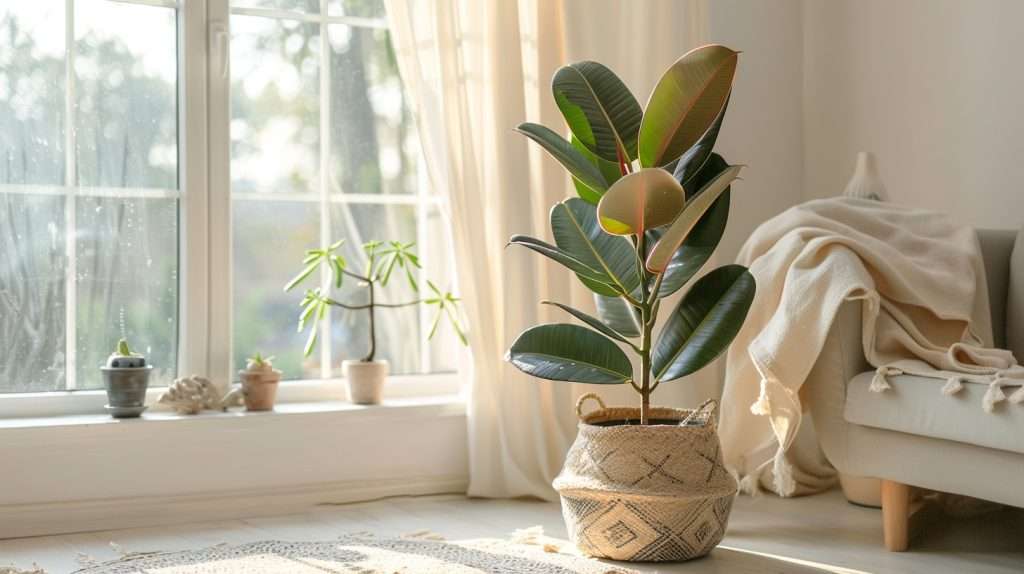
How to Care for a Rubber Plant: 8 Things to Keep an Eye On
Welcome to the complete guide on caring for a rubber plant. Rubber plants, also known as Ficus elastica, are popular ornamental plants that can bring life and beauty to any space.
Whether you’re a seasoned houseplant enthusiast or just starting your plant journey, this guide will provide you with all the information you need to keep your rubber plant thriving.
How to Care for a Rubber Plant: A Complete Guide
Introduction to Rubber Plants
Rubber plants, scientifically known as Ficus elastica, are native to the rainforests of India and Malaysia (The Sill). In their natural habitat, these plants can reach towering heights of up to 100 feet! However, when kept indoors, rubber plants can still grow impressively, reaching heights of up to 8 feet if properly cared for (A Beautiful Mess).
Known for their glossy, dark green leaves, rubber plants make a stunning addition to any room. They have a unique ability to purify the air by removing toxins, making them not only aesthetically pleasing but also beneficial for your indoor environment (Plantura).
Whether you place them in a living room, bedroom, or office, rubber plants are sure to bring a touch of natural beauty to your space.
Benefits of Having a Rubber Plant
Aside from their visual appeal, rubber plants offer several benefits that make them a popular choice among houseplant lovers. Here are some of the benefits of having a rubber plant:
- Air purification: Rubber plants have been shown to filter toxins from the air, improving the air quality in your home or office.
- Low maintenance: Rubber plants are relatively easy to care for, making them suitable for both experienced plant parents and beginners.
- Versatility: Rubber plants can thrive in various indoor environments, including low light conditions. This versatility makes them a great choice for different spaces in your home.
- Aesthetically pleasing: With their large, shiny leaves, rubber plants add a touch of natural beauty to any room.
- Stress reduction: Having plants indoors, including rubber plants, has been linked to reduced stress levels and improved overall well-being.
Caring for a rubber plant involves providing the right amount of light, maintaining optimal temperature levels, watering appropriately, and more. In the following sections, we will delve into the specific care requirements for rubber plants, ensuring that you have all the knowledge you need to keep your rubber plant healthy and thriving.
For detailed information on each aspect of rubber plant care, feel free to explore the relevant sections in this guide.
You can learn about rubber plant pruning, propagation, watering, repotting, common pests and diseases, and much more.
Let’s dive in and master the art of caring for a rubber plant!
Light and Temperature Requirements
When it comes to providing the optimal environment for your rubber plant, understanding its light and temperature requirements is essential. Proper light exposure and temperature levels ensure the healthy growth and vitality of your plant.
Providing the Right Amount of Light
Rubber plants prefer bright, indirect light but can tolerate some shade (A Beautiful Mess).
They should be placed in a location where they receive bright, filtered light throughout the day. While they can tolerate some direct sunlight, it’s best to keep them away from intense, direct sunlight as it can scorch the leaves (Plantura).
Placing your rubber plant near a north or east-facing window is ideal, as it provides the right balance of light intensity.
If you notice your rubber plant leaning towards one side, it’s an indication that it is not receiving enough light. In this case, rotate the plant periodically to ensure even growth.
Maintaining Optimal Temperature Levels
Rubber plants are sensitive to temperature fluctuations and prefer temperatures between 60-75°F (15-24°C) (The Sill).
They should be kept away from drafts and cold windows to prevent temperature extremes that can negatively impact their growth. Avoid placing them near heating or cooling vents, as hot, dry air or sudden blasts of cold air can be detrimental to the plant’s health.
It’s important to note that rubber plants are more sensitive to cold temperatures compared to heat. Therefore, it’s crucial to protect your rubber plant from cold drafts and temperatures below 60°F (15°C). If the temperature drops significantly, consider moving your rubber plant to a warmer location or using a protective cover to shield it from chilly air.
By providing the right amount of light and maintaining optimal temperature levels, you can create a favorable environment for your rubber plant to thrive.
Remember to monitor the light intensity and temperature fluctuations regularly to ensure the well-being of your plant. For more detailed care instructions, visit our article on rubber plant indoor care.
Watering and Humidity
Proper watering and humidity are essential for the health and well-being of your rubber plant. In this section, we will provide guidelines for watering your rubber plant and tips for creating the perfect humidity level.
Watering Guidelines for Rubber Plants
When it comes to watering your rubber plant, it’s crucial to strike the right balance. Overwatering can lead to root rot, while underwatering can cause the plant to dry out. The general rule of thumb is to water your rubber plant when the top inch of soil feels dry. This allows you to avoid overwatering and maintain proper moisture levels.
To prevent waterlogging and root rot, ensure that the pot has drainage holes to allow excess water to escape.
It’s also advisable to use well-draining soil for your rubber plant. Mixing potting soil with perlite or sand can improve drainage and prevent water from sitting around the roots (Gardening Know How).
For more detailed information on watering your rubber plant, check out our article on rubber plant watering.
Creating the Perfect Humidity Level
Rubber plants prefer moderate humidity levels, as they are native to tropical regions. While they can tolerate lower humidity, providing the right level of humidity can promote healthier growth and prevent issues like dry leaf tips and edges.
To increase humidity around your rubber plant, you have a few options. One method is to mist the leaves with water using a spray bottle. Mist the leaves regularly, especially during dry seasons or when the indoor air is dry. Another option is to place the plant on a tray filled with water and pebbles. As the water evaporates, it increases the humidity around the plant. Just make sure the bottom of the pot is not submerged in water to avoid waterlogging.
If you live in a particularly dry climate or struggle to maintain humidity levels, you can also consider using a humidifier near your rubber plant. This ensures a consistent and optimal level of humidity. For more information on caring for rubber plants indoors, including humidity requirements, refer to our article on rubber plant indoor care.
By following these watering guidelines and creating the right humidity level, you can help your rubber plant thrive. Remember to pay attention to the specific needs of your plant and adjust watering and humidity practices accordingly.
Soil and Fertilizer
To ensure the optimal growth and health of your rubber plant, it’s important to pay attention to the soil and provide the necessary nutrients. Let’s explore the key aspects of soil selection and fertilization for your rubber plant.
Choosing the Right Soil for Rubber Plants
Rubber plants thrive in well-draining soil to prevent the risk of root rot. A combination of potting soil and perlite or sand can help improve drainage and create an ideal growing environment for your plant (Gardening Know How). When selecting a potting mix, look for one specifically formulated for indoor plants or tropical plants.
You can also consider creating your own potting mix by combining equal parts of peat moss, perlite, and regular potting soil. This mixture provides good drainage while retaining enough moisture for the roots. Avoid using garden soil, as it tends to be too heavy and may not promote optimal growth.
During the repotting process, ensure that the new pot has drainage holes to allow excess water to escape. This helps prevent waterlogged soil, which can lead to root rot.
If you’re unsure about when to repot your rubber plant, check out our article on rubber plant repotting for guidance.
Feeding Your Rubber Plant
Feeding your rubber plant with the right nutrients is essential for its overall health and growth. During the active growing season, which is typically spring and summer, your rubber plant will benefit from regular fertilization. A balanced, water-soluble fertilizer is recommended for providing the necessary nutrients.
Fertilize your rubber plant every 2-4 weeks, following the instructions on the fertilizer packaging. Dilute the fertilizer to half the recommended strength to avoid overfertilization, which can harm the plant. Always apply the fertilizer to moist soil to prevent root burn.
During the dormant season, which is usually fall and winter, reduce the frequency of fertilization to once every 6-8 weeks. This allows the plant to rest and prepare for new growth in the following season.
Remember to wipe the leaves of your rubber plant with a damp cloth regularly to remove dust and improve its ability to absorb light. This simple maintenance routine helps keep your plant healthy and thriving.
By choosing the right soil and providing adequate fertilization, you can create an optimal environment for your rubber plant to thrive. Combine these practices with proper watering, lighting, and pruning techniques to ensure the long-term health and beauty of your rubber plant.
Pruning and Propagation
Taking care of your rubber plant involves proper pruning and propagation techniques to ensure its health and promote growth. Here are some essential tips on pruning and propagating your rubber plant.
Pruning Tips for Rubber Plants
Regular pruning is beneficial for maintaining the size, shape, and overall appearance of your rubber plant. It also helps to remove any dead or diseased parts. When pruning your rubber plant, it’s important to use clean, sharp pruning shears to prevent the spread of diseases. Here’s a step-by-step guide to pruning your rubber plant:
-
Start by inspecting your plant for any dead or damaged leaves, branches, or stems. These should be removed to encourage new growth.
-
Make clean cuts just above a leaf node or bud. This encourages new growth to emerge from that point, promoting a bushier appearance.
-
If your rubber plant has become too tall or leggy, you can cut back the main stem to promote branching. Make the cut just above a leaf node or bud to encourage new growth from that point.
-
Pruning should ideally be done in spring or early summer when the plant is actively growing (A Beautiful Mess).
By following these pruning tips, you can keep your rubber plant looking its best and help it thrive.
Propagating Rubber Plants
Propagating your rubber plant allows you to create new plants from cuttings, giving you the opportunity to expand your collection or share plants with friends. There are two common methods for propagating rubber plants: stem cuttings and air layering.
Stem Cuttings:
- Select a healthy stem on your rubber plant and take a cutting that is 4-6 inches long. Make sure the cutting has at least two leaves.
- Remove the lower leaves from the cutting, leaving only a few leaves at the top.
- Dip the cut end of the stem in rooting hormone to encourage root development.
- Plant the cutting in a well-draining potting mix, ensuring that at least one node is buried in the soil.
- Place the cutting in a warm, humid environment, such as a greenhouse or a covered container, to promote root growth.
- Keep the soil slightly moist but not overly wet. After several weeks, roots should begin to develop.
- Once the roots are well-established, you can transfer the cutting to a larger pot with regular rubber plant care.
Air Layering:
- Select a healthy branch on your rubber plant and make a small incision in the middle of the branch.
- Apply rooting hormone to the incision and wrap the area with moist sphagnum moss.
- Cover the moss with plastic wrap and secure it with a rubber band. This creates a humid environment for root development.
- Check the moss regularly to ensure it remains moist. Roots will begin to develop within a few weeks to a few months, depending on the plant.
- Once the roots are well-established, cut the branch below the rooted area and pot it as a new plant.
By following these propagation methods, you can expand your rubber plant collection and enjoy the beauty of these versatile houseplants.
Remember to provide proper care for your newly propagated rubber plants, including appropriate watering, light, and temperature conditions.
For more information on rubber plant care, check out our complete guide on rubber plant care.
Common Pests and Diseases
Taking care of your rubber plant includes being aware of common pests and diseases that can affect its health. Here we will discuss how to identify and treat scale insects, mealybugs, spider mites, and aphids.
Identifying and Treating Scale Insects
Scale insects are one of the most common pests that can infest rubber plants. They appear as small, round bumps on the leaves and stems. If left untreated, they can cause yellowing, leaf drop, and overall decline of the plant.
To identify scale insects on your rubber plant, look for these characteristic bumps.
To treat scale insects, there are a few options you can consider.
First, you can manually remove them by gently wiping them off with a cloth or cotton swab soaked in rubbing alcohol. This will help eliminate the visible pests. Alternatively, you can use insecticidal soap or horticultural oil, following the instructions on the product label. These treatments can effectively control scale insects and prevent further damage to your rubber plant.
For more information on rubber plant care, including pruning and propagation, visit our article on rubber plant care.
Dealing with Mealybugs, Spider Mites, and Aphids
Mealybugs are another common pest that can infest rubber plants.
They are small, soft-bodied insects covered in a waxy, white substance. Mealybugs feed on the plant’s sap and can cause stunted growth and yellowing leaves. To identify mealybugs, look for the white, cotton-like masses on your rubber plant.
To control mealybugs, you can use insecticidal soap or wipe them off the plant with a cotton swab soaked in rubbing alcohol. These methods can help eliminate the pests and prevent further damage to your rubber plant.
Spider mites are tiny pests that can be difficult to see with the naked eye. They feed on the leaves of rubber plants, causing yellow spots, webbing, and leaf drop. Increasing humidity by regularly misting the plant can help control spider mites, as they thrive in dry conditions.
In severe infestations, you may need to use insecticidal soap or horticultural oil to treat the plant.
Aphids are small, soft-bodied insects that can also infest rubber plants. They feed on the plant’s sap, causing distorted growth and yellowing leaves.
To control aphids, you can use insecticidal soap or a strong stream of water to remove them from the plant. Additionally, introducing natural predators like ladybugs can help control aphid populations.
By being vigilant and taking prompt action, you can effectively manage these common pests and diseases that may affect your rubber plant. Regularly inspect your plant for any signs of infestation and follow the appropriate treatment methods to keep your rubber plant healthy and thriving.
For more information on troubleshooting and problem-solving for your rubber plant, check out our article on rubber plant diseases.
Troubleshooting and Problem Solving
Taking care of your rubber plant requires attentiveness and understanding of its needs. Sometimes, issues may arise that can affect the health of your plant. Here are two common problems you may encounter and how to address them: yellowing leaves and leaf drop, as well as wrinkled or wilting leaves.
Yellowing Leaves and Leaf Drop
Yellowing leaves and leaf drop are often signs of overwatering, which can lead to root rot and negatively impact the health of your rubber plant (A Beautiful Mess). Overwatering can be fatal to rubber plants, so it’s important to avoid this by allowing the top inch or two of soil to dry out before watering again (The Sill).
To address yellowing leaves and leaf drop:
- Assess the watering frequency: Check if you are watering your rubber plant too frequently. Remember that rubber plants are somewhat drought-tolerant and prefer to dry out between waterings (Gardening Know How). Adjust your watering schedule accordingly, allowing the soil to dry out before the next watering.
- Check drainage: Ensure that your rubber plant’s pot has proper drainage holes to prevent water from pooling at the bottom. Excess water should be able to drain freely to avoid root rot.
- Adjust watering volume: When watering your rubber plant, ensure that you are not overwatering it. Water the plant thoroughly, allowing water to flow through the drainage holes, but avoid leaving it sitting in excess water for extended periods.
Wrinkled or Wilting Leaves
Wrinkled or wilting leaves can be caused by underwatering or insufficient moisture. Rubber plants perform best when the soil is kept slightly moist, but not overly saturated. If your plant’s leaves appear wrinkled or are wilting, consider the following steps:
- Check the moisture level: Gently insert your finger into the soil to assess its moisture. If the top inch or so feels dry, it may indicate that your rubber plant needs watering.
- Water thoroughly: When watering, ensure that you provide enough water to thoroughly moisten the root system. Water the plant until you see water draining from the bottom of the pot.
- Maintain consistent moisture: Aim to keep the soil slightly moist but avoid letting it become waterlogged. Adjust your watering frequency to maintain this balance, taking into account factors such as humidity and temperature.
By addressing these issues promptly, you can help your rubber plant regain its health and vitality. Remember to monitor the watering needs of your plant and adjust accordingly to maintain optimal moisture levels.
If problems persist, consider seeking advice from a plant specialist or referring to our article on rubber plant diseases for further guidance.
Frequently Asked Questions
Here are some frequently asked questions about caring for rubber plants:
Can rubber plants tolerate direct sunlight?
Rubber plants prefer bright, indirect light but can tolerate some shade. While they don’t necessarily require direct sunlight, they can tolerate it to some extent. It’s important to strike a balance to avoid excessive sun exposure, which can lead to leaf burn. Placing your rubber plant near a window with filtered or indirect sunlight is ideal. If you notice signs of sunburn, such as brown spots on the leaves, it’s best to move the plant to a slightly shadier location. For more information on rubber plant care, visit our article on rubber plant care.
How fast do rubber plants grow?
Rubber plants have the potential to grow quite large if given the right conditions. On average, a rubber plant can grow about 24 inches (60 cm) per year. However, growth rate can vary depending on factors such as light, temperature, humidity, and overall care. Young rubber plants tend to grow more rapidly compared to mature ones. Regular pruning and proper care can help maintain a manageable size for your rubber plant. For tips on pruning and maintaining your rubber plant’s growth, refer to our article on rubber plant pruning.
Remember that individual growth rates may vary, so it’s important to monitor your rubber plant’s development and adjust care accordingly. With patience and proper care, your rubber plant can thrive and become a beautiful addition to your indoor space.